Automate site builds with webhooks
sensenet offers built-in integration with several well-known platforms. These are customized webhooks that contain predefined platform-specific settings. Using them lets you trigger certain events on these platforms when something happens in the repository.
Once you've setup a static site with your favorite provider (Netlify, Travis CI, etc.), you're ready to work with webhooks to be triggered by content events in your repository. This tutorial will show you how to setup webhooks using built-in templates to trigger builds and deployments of static sites for various popular providers like Netlify, Gatsby Cloud or Heroku.
Netlify
With this template you can easily create webhooks that notify projects hosted on Netlify about the chosen content related events (creation, change, approval, etc.), automatically triggering a build to deploy a new version of the app.
Go to your Netlify site and create a build hook for sensenet (it can be found under Site > Site settings > Build & Deploy > Build hooks)
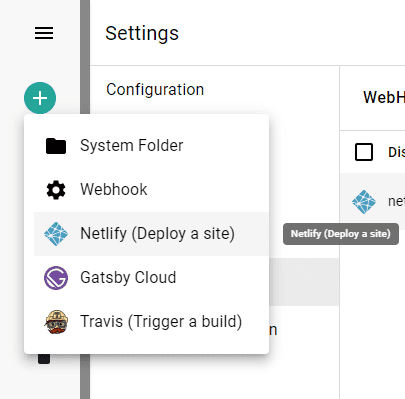
On sensenet admin ui choose Netlify template when you add a new webhook:
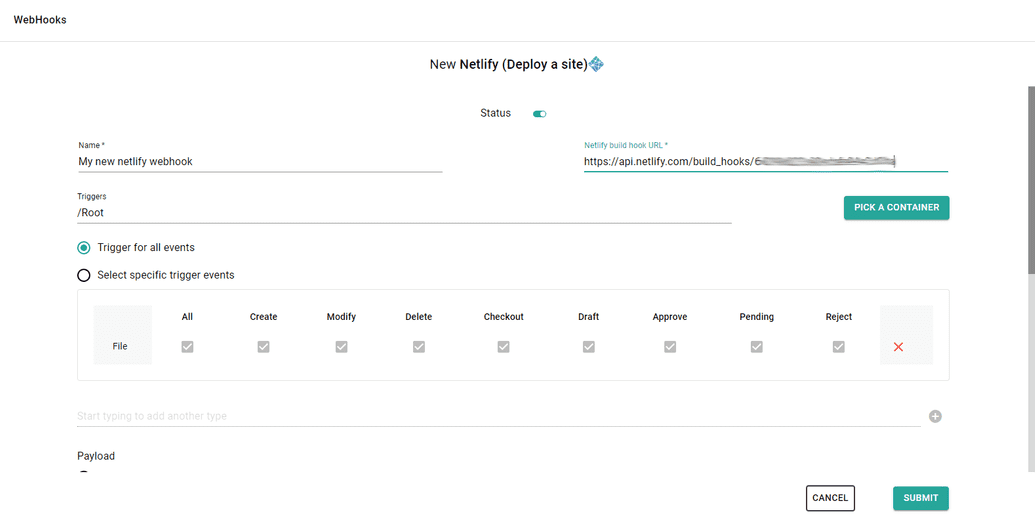
There are two required fields on the form to fill out: Name and Netlify build hook URL (the url you've created above at Netlify Build and Deploy page). You can leave all other fields at default (you can change them at any time later) and thats it.
By default, this webhook will:
- Trigger a Netlify build
- Triggered when something is happened with a File under /Root
- Triggered on all available events (Create, Modify, Delete, Checkout, Draft, Approve, Pending, Reject)
Travis CI
With this template you can easily create webhooks that notify projects hosted on Travis CI about the chosen content related events (creation, change, approval, etc.), automatically triggering a build to deploy a new version of the app.
Get a Personal API Token (it can be found under your Travis CI profile page)
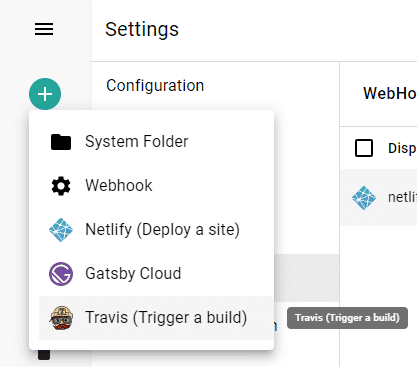
On sensenet admin ui choose Travis CI template when you add a new webhook:
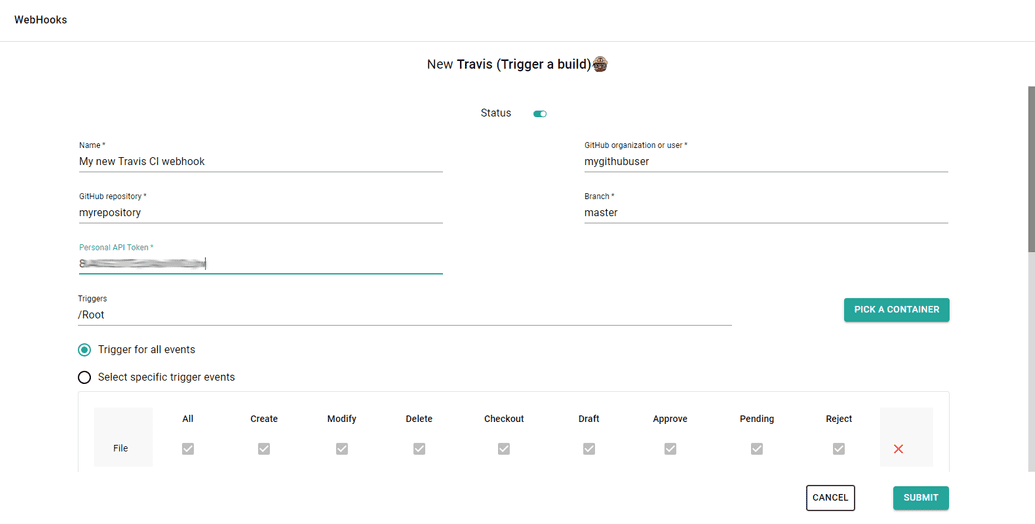
There are five required fields on the form to fill out: Name, GitHub organization or user name, GitHub repository name, Branch and Personal API Token (the one you can find at your Travis CI profile page). You can leave all other fields at default (you can change them at any time later) and thats it.
By default, this webhook will:
- Trigger a Travis CI build
- Triggered when something is happened with a File under /Root
- Triggered on all available events (Create, Modify, Delete, Checkout, Draft, Approve, Pending, Reject)
Gatsby Cloud
With this template you can easily create webhooks that notify your site on Gatsby Cloud about the chosen content related events (creation, change, approval, etc.), automatically triggering a build to deploy a new version of the site.
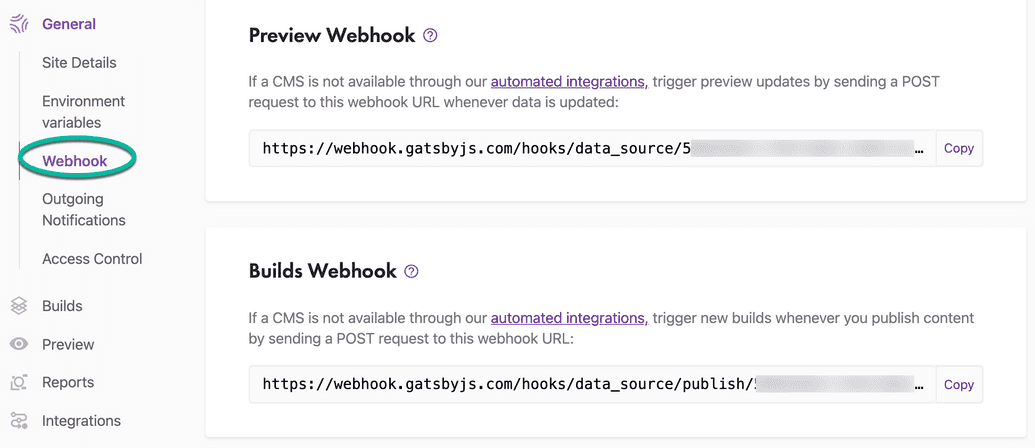
Go to your Gatsby Cloud and get the Build webhook (it can be found under Site setting > General > Webhook)
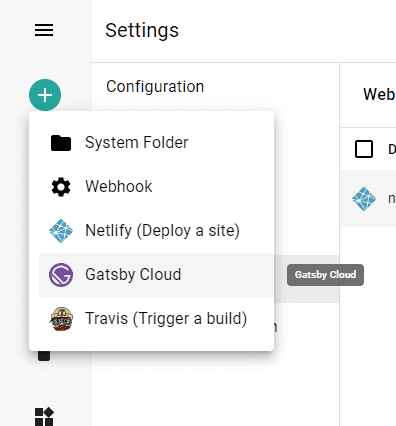
On sensenet admin ui choose Gatsby Cloud template when you add a new webhook:
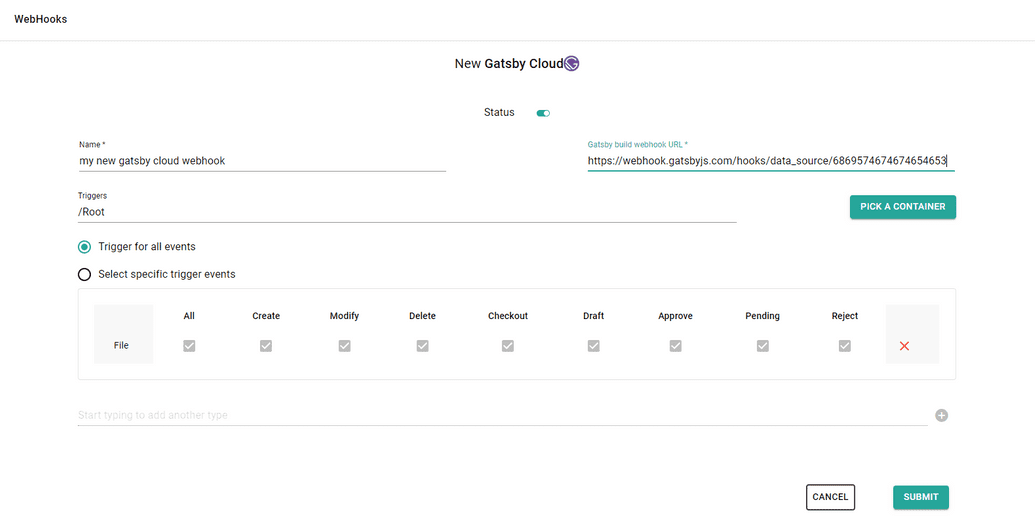
There are two required fields on the form to fill out: Name and Gatsby build webhook URL (the url mentioned above at Gatsby Cloud site settings). You can leave all other fields at default (you can change them at any time later) and thats it.
By default, this webhook will:
- Trigger a Gatsby Cloud build
- Triggered when something is happened with a File under /Root
- Triggered on all available events (Create, Modify, Delete, Checkout, Draft, Approve, Pending, Reject)
It is possible to trigger webhooks manually to try out if all the settings fit your needs. Select the webhook in the webhooks list and open command palette search with CTRL+SHIFT+P. Search for the FireWebHook and choose an action from the list based on what parameters you want to test with (path or id). Add the required parameters and execute the action.

